There are two ways to share your Inbox in Outlook. I need to point out from the start that you need to be using an exchange server for this to work. You can’t use these methods to share your inbox from home. OK, now that’s out of the way let’s get down to it. The first method of sharing your inbox is delegation. It’ great if you just want to share your inbox, however if you want to share your sent items too, then you need to use another method – see method 2.
Method 1
Sharing Outlook Folders Using Delegation
A simple way of sharing Outlook folders such as an inbox is the delegate authority to another trusted member of your organisation. As a Microsoft Office Master Instructor and trainer I spend a lot of time in the training room teaching face to face, so I need to share my inbox with my fellow team members in the office at Raising the Bar. Originally I used delegation to share my inbox. Let’s go through the process of setting up delegation for another user.
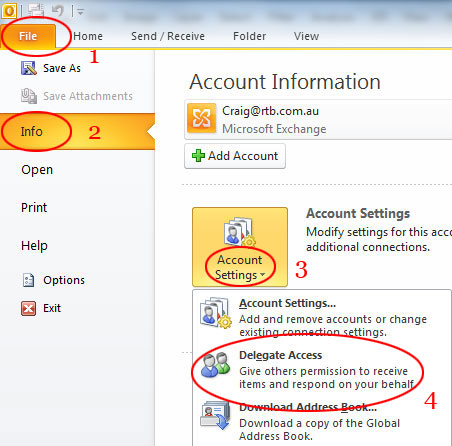
In Outlook 2010 you can find the tool here
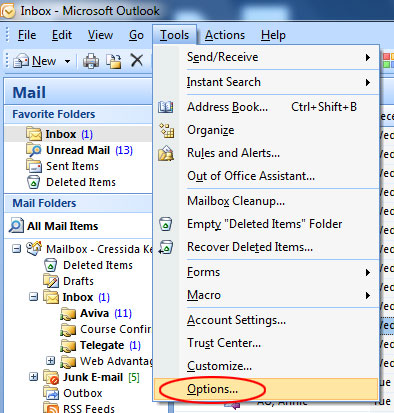
In Outlook 2007 you can find the tool here
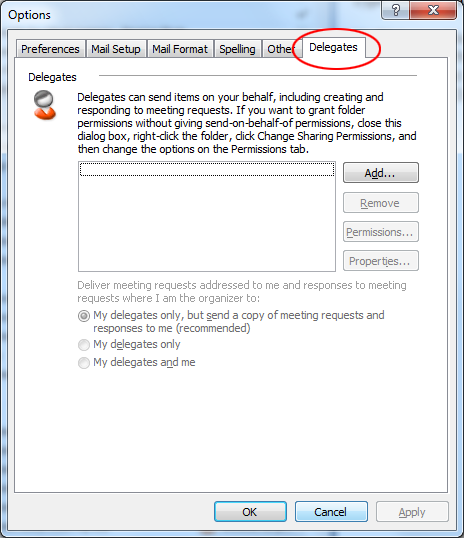
Continue for Both Outlook 2010 and 2007 Versions
Click the add button to search for the individual to add as a delegate. You will be prompted to select a user from the Global Address List (aka GAL). Make your selection by double clicking the user or select the user and click the Add button, and then click OK. Now we can make our selections from the drop-down options.
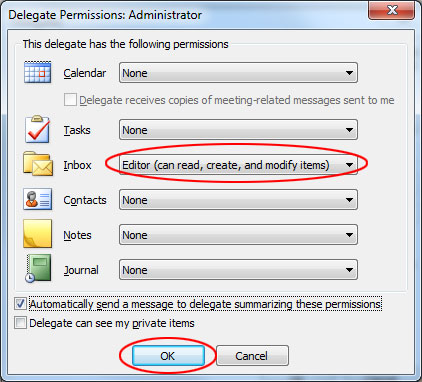
If you select the ‘Automatically send a message to delegate summarizing permissions’ to the person who you are delegating authority to, they will receive an email in their inbox notifying them of the permissions that have been assigned to them. I use this option every time I set up delegation.
Now your probably wondering how to see the folder (inbox) that has been delegated to you. You can now view the shared inbox temporarily by using the following method:
In Outlook 2010 you can open a shared folder here
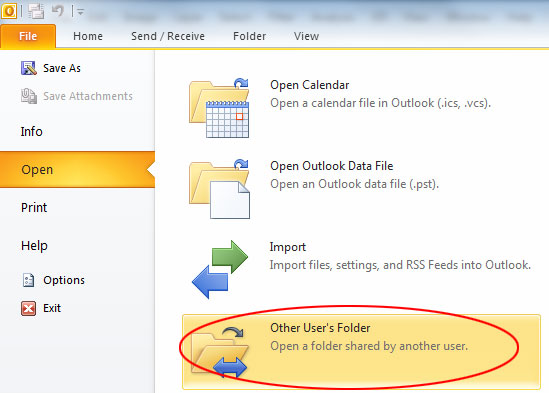
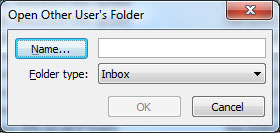
Click the Name button to select the other users account to view their Inbox
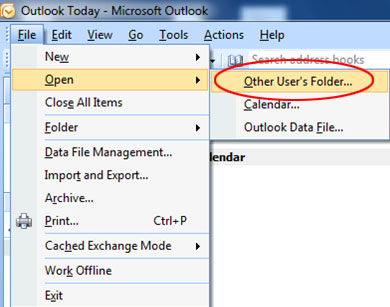
In Outlook 2007 you can open a shared folder here

Click the Name button to select the other users account to view their Inbox
Method 2
Sharing Outlook Folders by Setting Properties
The second method of sharing Outlook folders such as your inbox is to manually set properties. I now use this method most of the time because the shared folders are automatically displayed permanently and you can share other folders besides your inbox. If you use method 1 you can also use this method after delegation to permanently display the folders. This method also gives you the flexibility to display other folders including the sent folder and other important folders residing in the other users account. If I respond on behalf of someone else, I CC the user into the reply and then move it into their sent items. Lets face it, this is the first place look to see if they or someone else have previously responded to an email. Here we go:
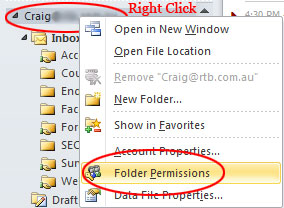
In Outlook 2010
In Outlook right click on your mailbox and click Folder Permissions.
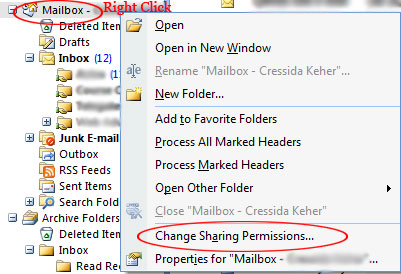
In Outlook 2007
In Outlook right click on your mailbox and click Change Sharing Permissions.
Continue for Both Outlook 2010 and 2007 Versions
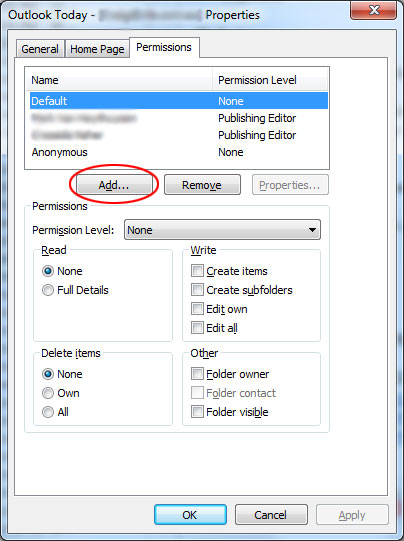
Click the add button to search for the individual to share your mailbox. You will be prompted to select a user from the Global Address List (aka GAL). Make your selection by double clicking the user or select the user and click the Add button, and then click OK. Now we can set the user permissions.
Setting User Permissions
Ensure that the user is selected in the top window and then make your selection from the Permissions Level drop-down list.
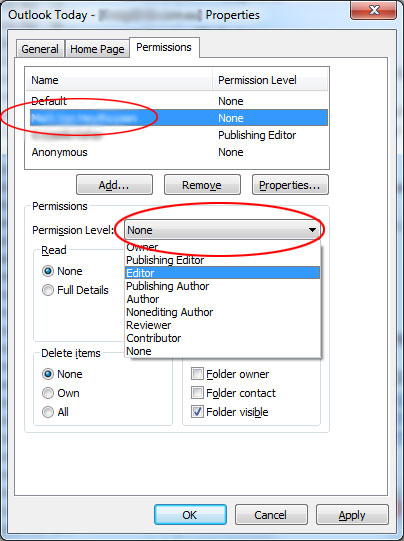
NB** This is only the permissions for the mailbox itself. The must go through the same process for each and every folder that you want to share.
In Outlook 2010
Right click on the Inbox or Folder you wish to share and click Properties and then select the Permissions Tab.
In Outlook 2007
Right click on the Inbox or Folder you wish to share and click Change Sharing Permissions.
For both versions
Select the user from the top window that you wish to assign permissions to and then select the Permission Level from the drop-down list just as we did before and then click OK. This will assign the necessary permissions for the user you want to share your folders with. The Access rights are listed below for your convenience. Keep reading, we are not finished yet.
Access Rights
| The access right name | Description |
| Read items | User can read items in the folder. If the user doesn’t have this rights, they will see an empty folder. |
| Edit own items | User can only edit the items that have been created themselves. |
| Edit all items | User can edit all items in the folder. |
| Delete own items | User can only delete the items that have been created by themselves. |
| Delete all items | User can delete all items in the folder. This right does not allow users to delete folders. In order to delete a folder, the “Folder owner” right is required. |
| Create items | User can create new items in the folder. |
| Create subfolders | This right only applies to public folders, because other users can’t create subfolders in your shared personal folders. |
| Folder visible | User can see the folder. If the user does not have this privilege, they can neither see the folder, nor any of its subfolders. |
| Folder owner | Only the user who has this right is allowed to delete a folder, change its name and define access rights to the folder for other users. The folder can have more than one owner, but among them there always has to be a user, who shares it. |
Opening the Shared Folder on the other user’s computer
Now that permissions have been set on your computer (your Outlook account to be precise) we need to open the shared folder on the other users computer (their Outlook account).
In Outlook 2010
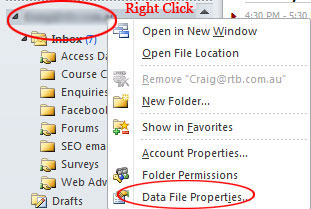
Right click on their mailbox and click Data File Properties.
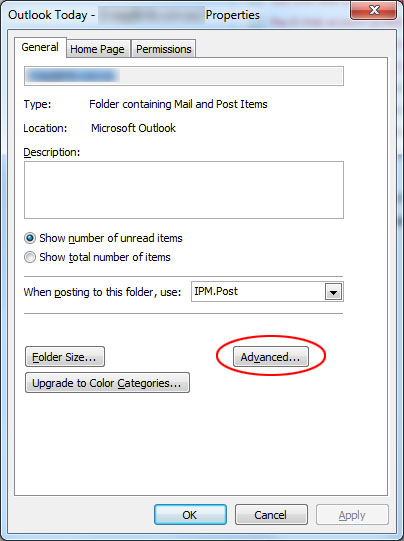
In Outlook 2007
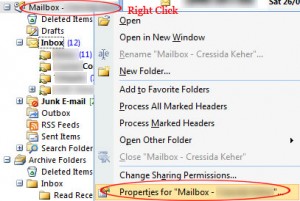
Right click on their mailbox and click Properties for Mailbox XXXX
For Both Outlook 2007 and Outlook 2010 Versions
Click the Advanced button.
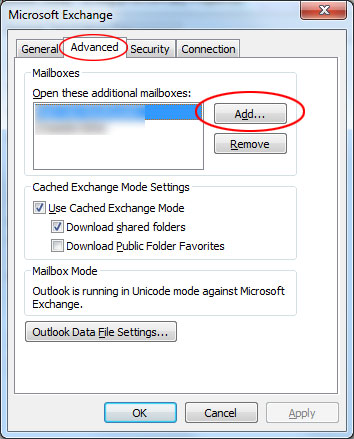
Go to the Advanced Tab and click the Add button.
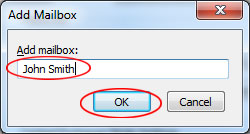
Type the name of the mailbox you want to add and click OK.
The mailbox will appear underneath your own mailbox in Outlook.
In summary, I normally add a mailbox using the second method. It gives you more options, greater flexibility and it’s always visible when you open Outlook.
Need Outlook Training?
Outlook Training Course Locations
Sydney (North Sydney)
Adelaide
Brisbane
Melbourne
Perth
